Hello Folks!
You may remember that I am developing a small piece of land along our driveway into a flower cutting patch. I've been itching to get at it and now Mr Clicky is home for good, it's all systems go.
The space is roughly 14m by 2m and had been planted with shrubs which had got unruly and overgrown and a clematis montana which was growing over the top.
At the far end there is a cherry tree and a hawthorn which are staying put.
At the near end were some very overgrown cornus (dogwood.)
This end also has a drop of 1/2 metre from the driveway to a path.
I started clearing in February in sub-zero temperatures, I was joined by this robin who sat on the stump of the clematis, so I stopped and had a chat with him.
I chopped everything up as small as I could to fit more into our council green bins.
Even with the bins being collected every fortnight I had to book a trip to the tip to take the larger roots and branches; one of the shrubs needed a chainsaw to cut the stump.
With most of the vegetation gone, I tackled the drop to the path.
I wanted this area to be one level so I can use it more productively, so I needed to raise it up.
I made a u shaped raised bed with pine sleepers, screwed to uprights which I cemented into the ground.
I lined the back with heavy duty plastic to prolong the life of the sleepers.
With the bed made I needed to top up the level of the 'soil'. In the background of this picture you can see a pile of stone and soil from my neighbour's extension. I scrabbled through it and got rid of the stones and barrowed it across the road. This took me 2 days.
The postie steps next to the bed needed a bit of attention so I sorted that too.
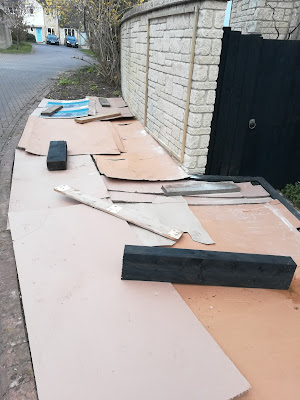
Back to the cutting patch now. I decided to go 'no dig' rather than try to remove a tangled mass of shrub roots. No dig is attributed Charles Dowding. In essence you cover your ground with a layer of cardboard to smother any weeds and layer with well rotted manure, garden compost, compost or top soil. You then plant straight into the mixture you have made, rather than disturbing the microbes, worms and beneficial insects within your soil.
A few weeks ago we covered half of the patch with cardboard.
I found some well rotted manure from a local stables and we spread it all over.
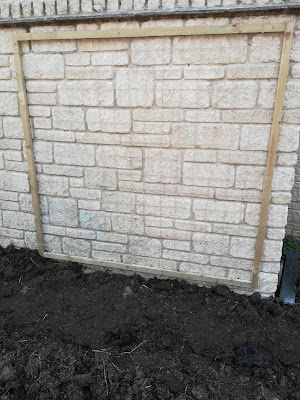
Mr Clicky helped me attach two wooden frames to our wall, these are for sweet peas.
We drilled holes through the frame at 10cm intervals and I threaded them with twine for the sweet peas to climb up.
Next job was to use old scaffold boards and bits of wood from our pile to make pathways so I can get to my flowers to pick them. I then topped up the manure with and good layer of peat free compost.
I've even planted some plants!
I have another load of manure coming next week so I need to repeat the process with the other half of the plot.
I am also growing loads of seeds to fill it. More on that another day.
That's me for now......Clicky Needles


Your hard work has paid off! What a difference! Glad to see Robin was there to give you some moral support :-) I am already looking forward to seeing the flowers that will bloom there :-) keep well Amanda x
ReplyDeleteWhat a great project. Your patch is going to look amazing!
ReplyDeleteWow ...,what a greg project. I am so looking forward to seeing it all,come into bloom 😃🌸😃
ReplyDeleteWow, you've really been working hard. How lovely this will look when all the flowers are in bloom.
ReplyDeleteWhat a sweet little robin. Our American robins look so gangly compared with English robins.
I checked out the American Robins when we were in Illinois, much bigger!
DeleteYou are soooo industrious! I look forward to seeing the floral results. ((hugs)), Teresa :-)
ReplyDelete